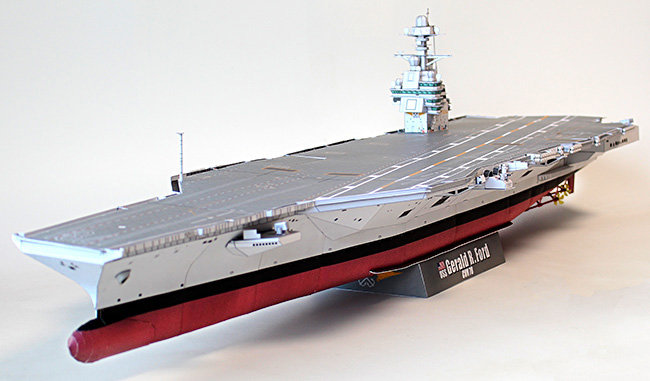
原子力空母「USSジェラルド・R・フォード」救命筏をつくる
組み立て手順
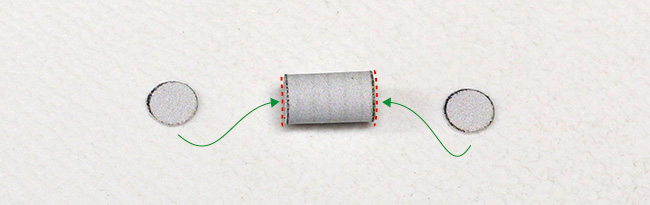
1. パーツx1の組み立て
展開図の「x1」を切り取り、下図のように筒状に接着します。

2. 円状パーツの取り付け
展開図の円状パーツの2つを切り取り、上でつくったパーツの両側に接着剤を塗り、接着します。2セットつくります。
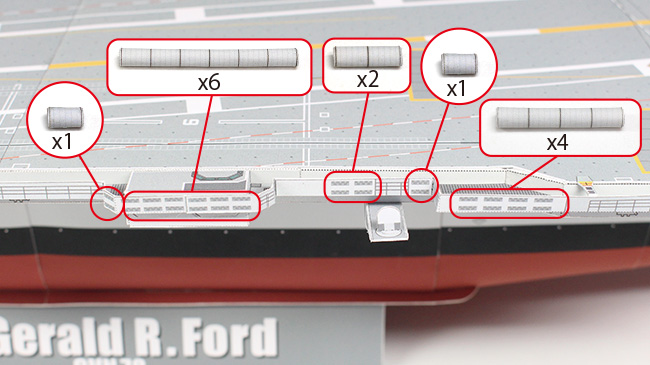
3. 左舷への取り付け (1)
上でつくったパーツを、飛行甲板の左舷の、赤丸で示した部分の2箇所に接着します。
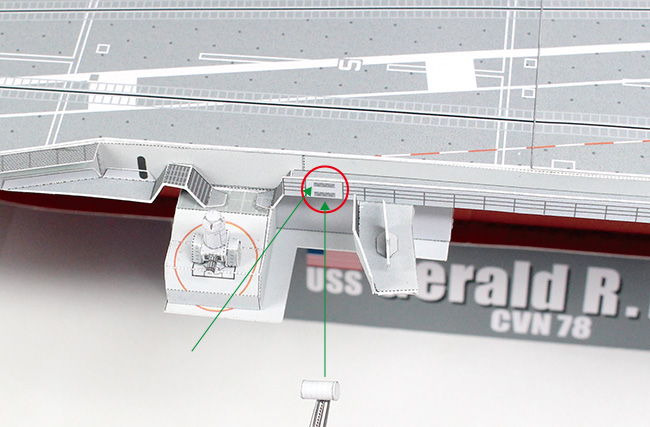
このようになります。
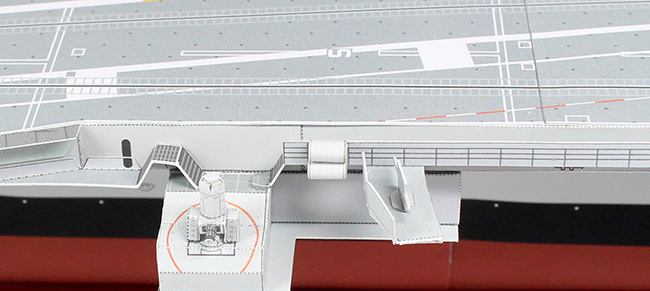
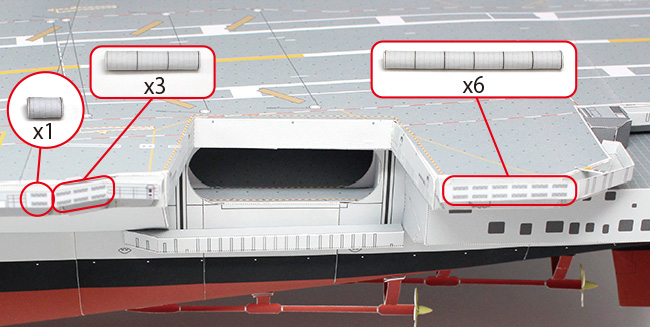
4. 左舷への取り付け (2)
上に続けて、飛行甲板の左舷の下図の場所にも、指定に従い同様に組み立てて接着してください。
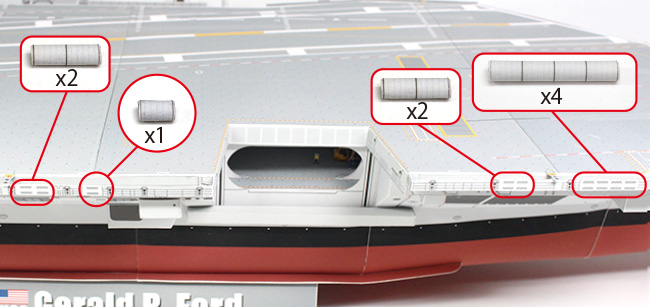
5. 右舷への取り付け
飛行甲板の右舷の下図の場所にも、指定に従い、上と同様に組み立てて接着してください。
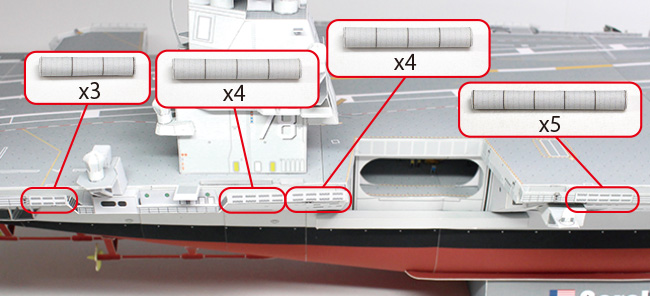
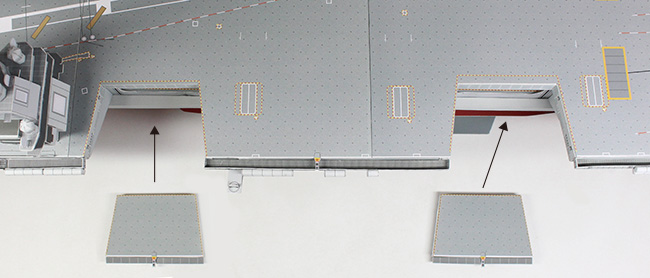
6. エレベータパーツの設置
保管しておいたエレベータパーツの下図の2個を、飛行甲板の右舷に取り付けます。
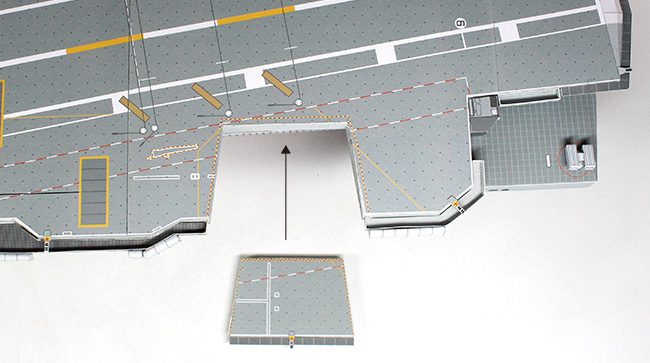
下図のエレベータパーツを、飛行甲板の左舷に取り付けます。
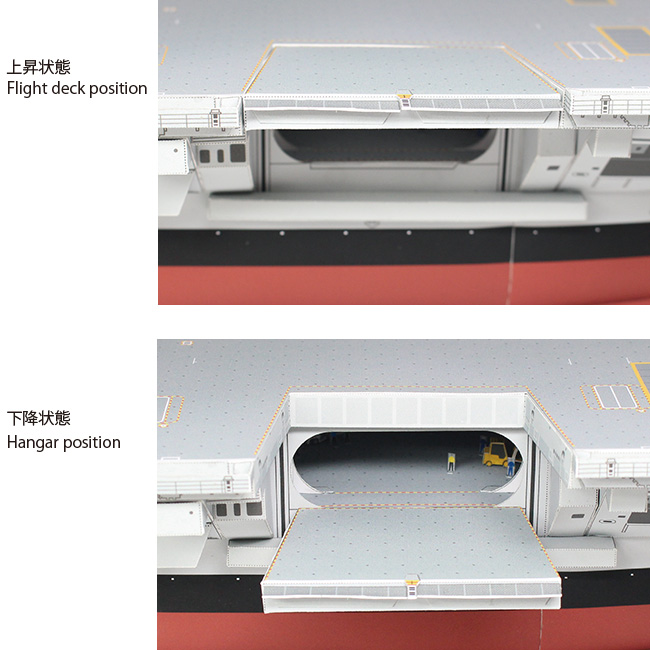
エレベータは下図のような状態になります。お好みに合わせて選択してください。
以上でアメリカ合衆国海軍 原子力空母「USSジェラルド・R・フォード(USS Gerald R. Ford, CVN-78)」のペーパークラフトの組み立ては終了です。
長い時間をお付き合い頂き、ありがとうございました。
今後も飛行甲板に並べる艦載機等を、追加オプションとして用意していく予定です。