原子力空母「USSジェラルド・R・フォード」格納庫をつくる-1
組み立て手順
1. エレベータの可動/固定選択とマグネット取り付け
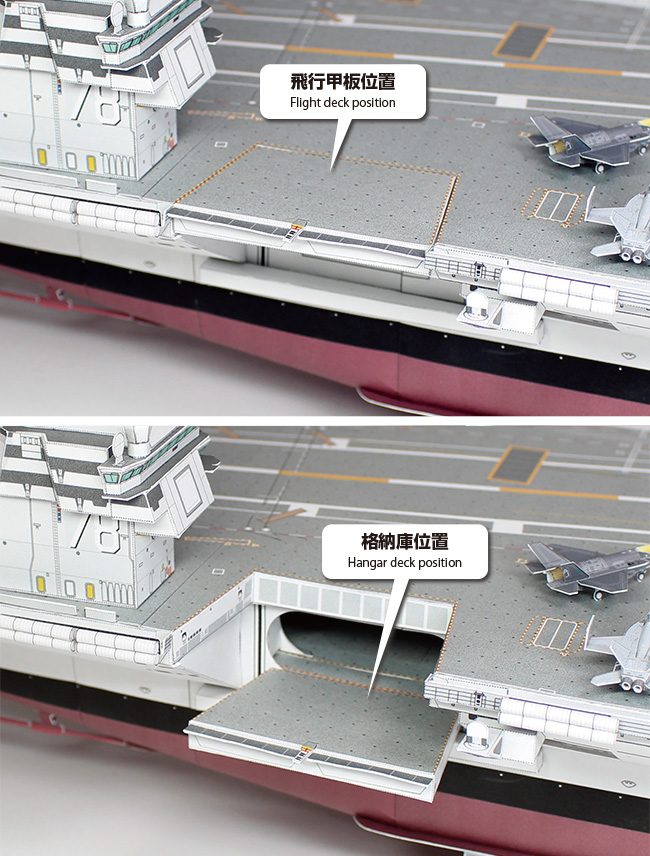
まず、完成時に飛行甲板上に3つあるエレベータを、マグネットを使用した可動式にするか、接着による固定式にするかを選択してください。
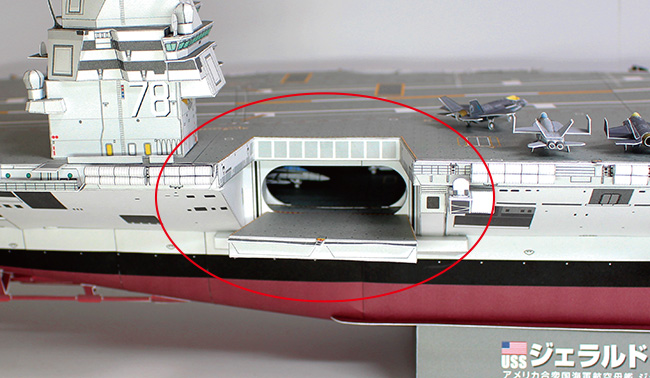
接着式にする場合は、飛行甲板位置か、格納庫位置かの二択となり、接着後の変更はできません。接着式にする場合はこのページのステップ1のマグネット取り付け作業はスキップしても構いません。
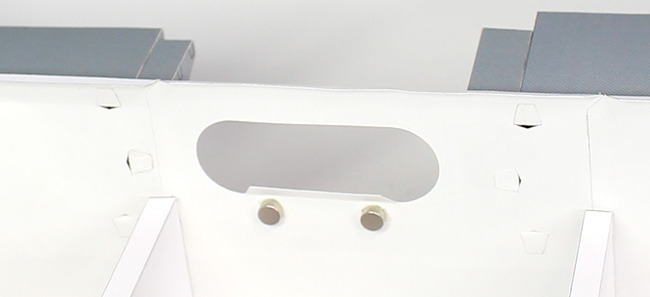
マグネットによる可動式にする場合は、直径5~6mm程度の強力マグネット(ネオジム磁石)をご用意ください。100円均一ショップなどでも入手可能です。
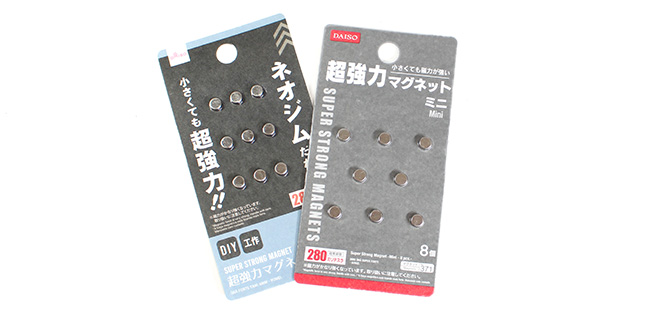
写真は100円ショップ「ダイソー」で販売している商品の例です。一箇所に付き4粒、三箇所で合計12粒を使用します。
店舗で入手困難な場合は通販でもご購入頂けます。
リンク
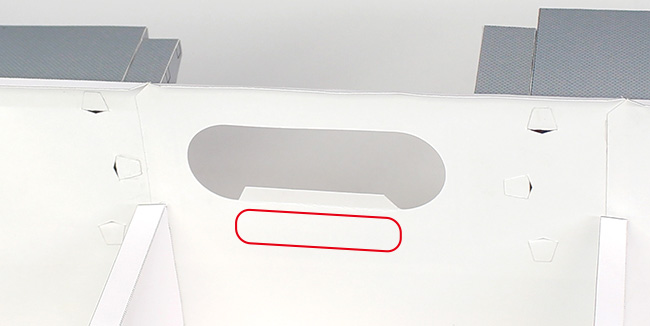
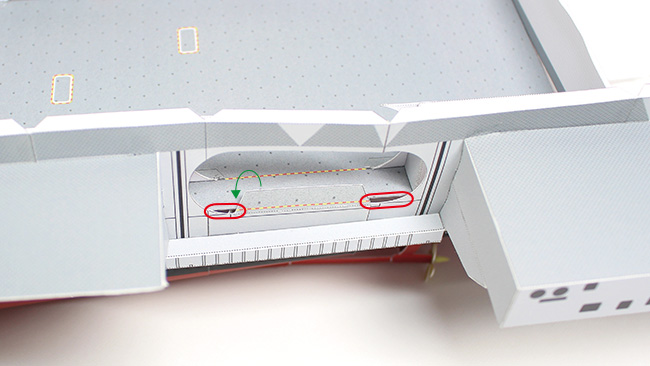
磁石の2つを下図の赤枠で示した部分に、両面テープを使って接着します。3箇所に行います。
両面テープは下のものがお薦めです。
リンク
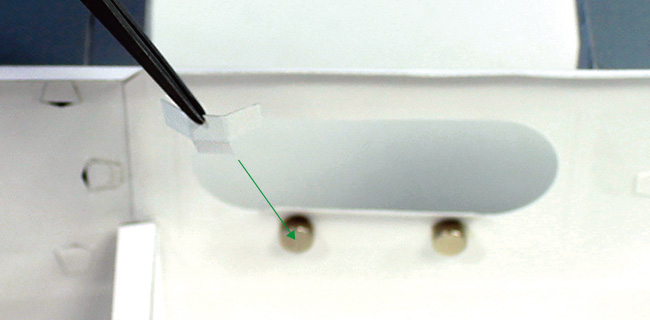
接着すると、このようになります。
磁石の脱落防止の為に、下図のように補強をしておくと安心です。補強用のデータはこちらをどうぞ。普通紙で大丈夫です。
2. 格納庫パーツの組み立て
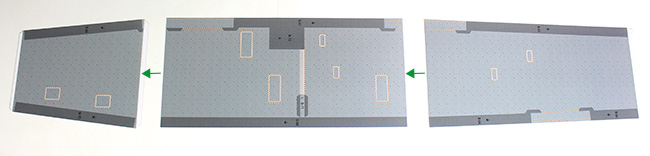
ここからは格納庫の組み立て方解説になります。展開図の「B-60」「B-61」「B-62」を切り取り、下図のように接着します。
3. パーツB-63の接着
展開図の「B-63」切り取って折り、下図のように接着します。
このようになります。
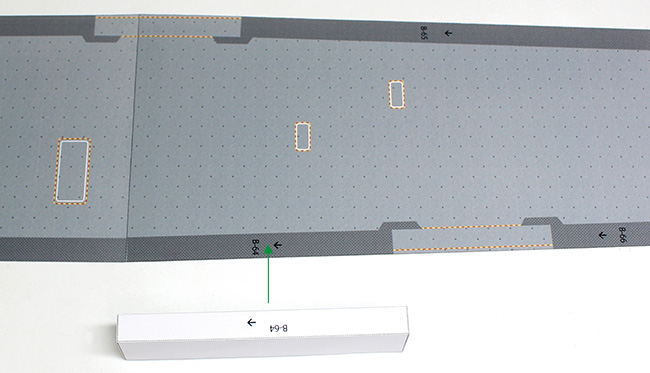
4. パーツB-64の組み立てと取り付け
展開図の「B-64」を切り取って折り線指示に従って折り、下図のように接着します。
上でつくったパーツを、2でつくったパーツの「B-64」と書かれた場所に接着します。前後、上下を間違えないように注意してください。
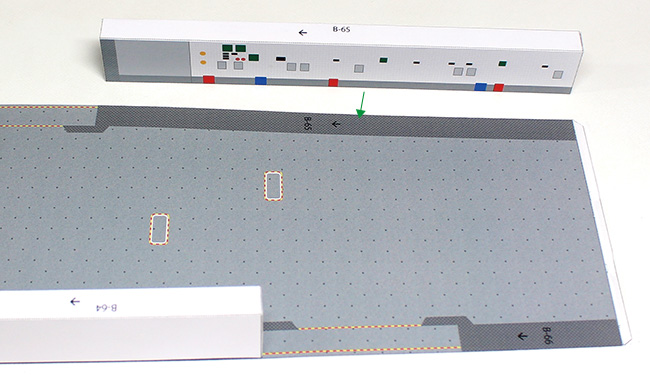
5. パーツB-65の組み立てと取り付け
展開図の「B-65」を切り取って折り線指示に従って折り、下図のように接着します。
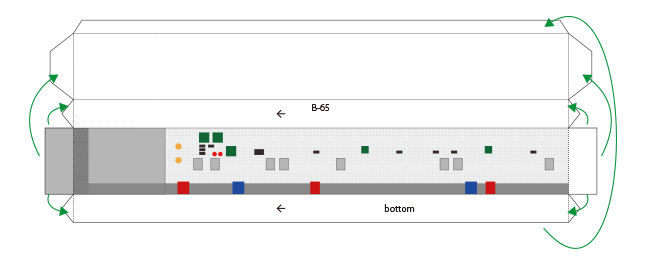
上でつくったパーツを、2でつくったパーツの「B-65」と書かれた場所に接着します。前後、上下を間違えないように注意してください。
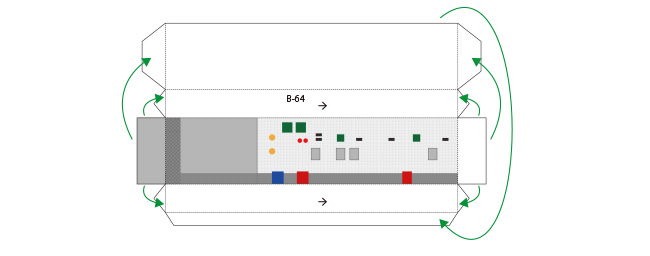
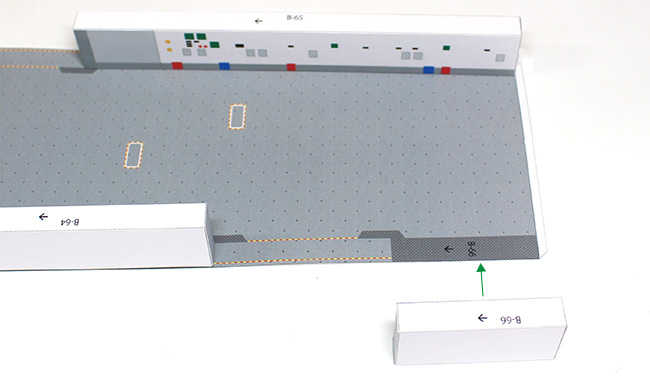
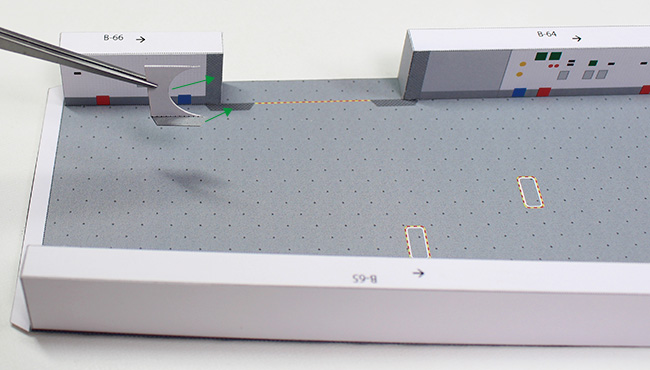
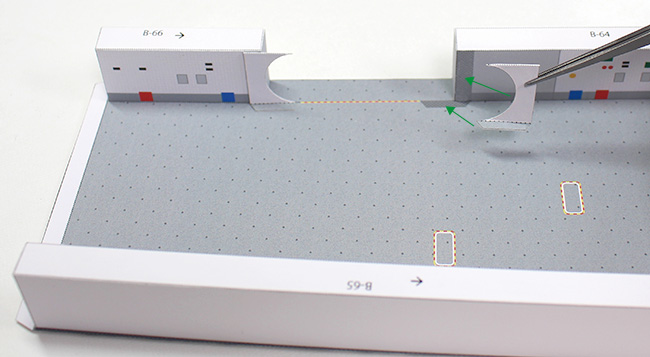
6. パーツB-66の組み立てと取り付け
展開図の「B-66」を切り取って折り線指示に従って折り、下図のように接着します。
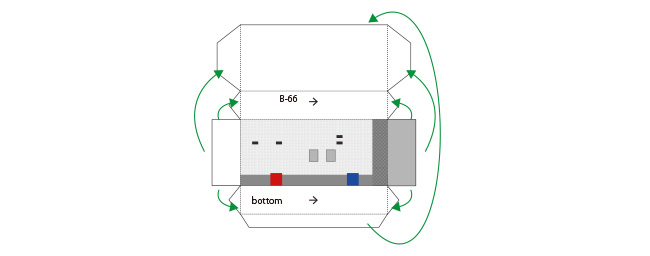
上でつくったパーツを、5でつくったパーツの「B-66」と書かれた場所に接着します。前後、上下を間違えないように注意してください。
7. パーツB-67の組み立てと取り付け
展開図の「B-67」を切り取って折り線指示に従って折り、下図のように接着します。
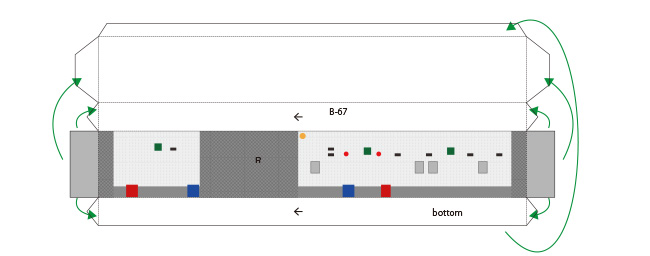
上でつくったパーツを、6でつくったパーツの「B-67」と書かれた場所に接着します。前後、上下を間違えないように注意してください。

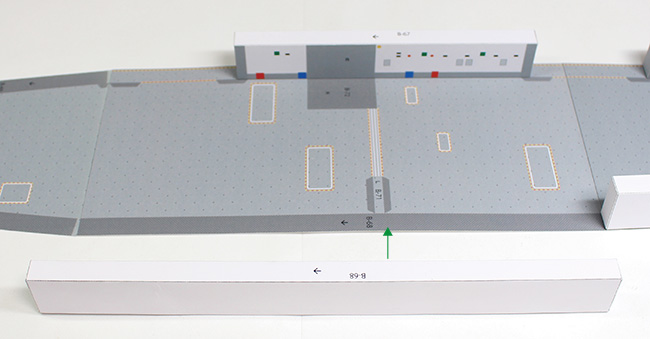
8. パーツB-68の組み立てと取り付け
展開図の「B-68」を切り取って折り線指示に従って折り、下図のように接着します。
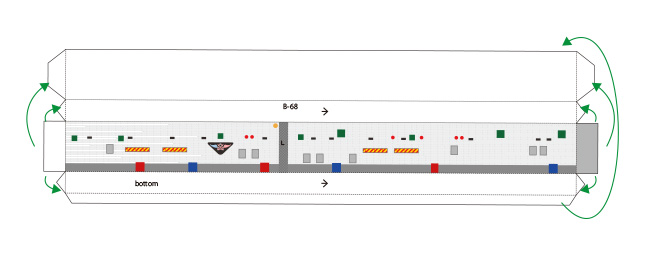
上でつくったパーツを、7でつくったパーツの「B-68」と書かれた場所に接着します。前後、上下を間違えないように注意してください。
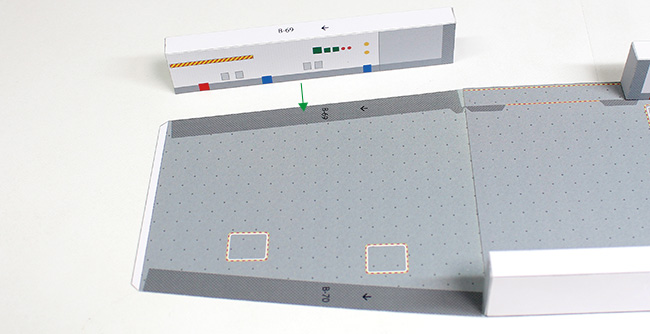
9. パーツB-69の組み立てと取り付け
展開図の「B-69」を切り取って折り線指示に従って折り、下図のように接着します。
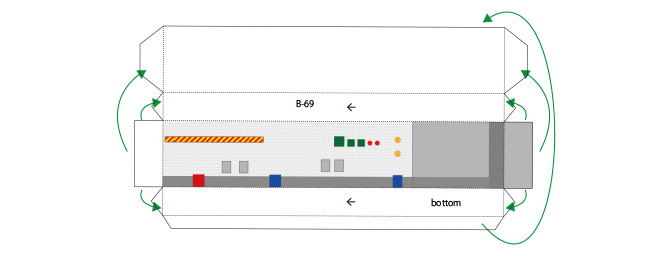
上でつくったパーツを、8でつくったパーツの「B-69」と書かれた場所に接着します。前後、上下を間違えないように注意してください。
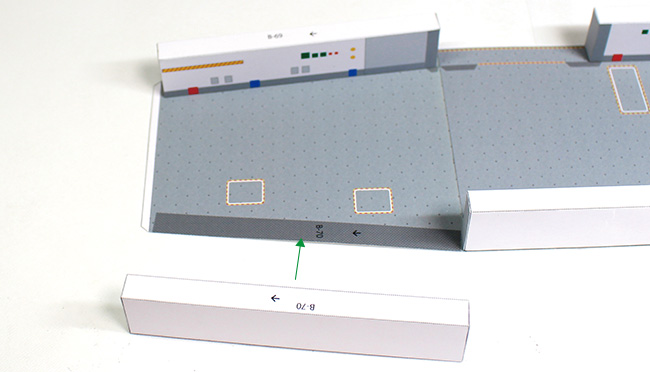
10. パーツB-70の組み立てと取り付け
展開図の「B-70」を切り取って折り線指示に従って折り、下図のように接着します。
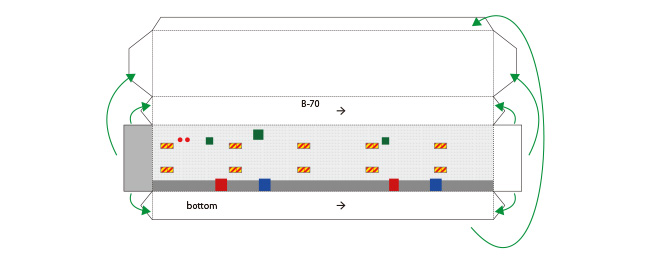
上でつくったパーツを、9でつくったパーツの「B-70」と書かれた場所に接着します。前後、上下を間違えないように注意してください。
11. パーツB-71の組み立てと取り付け
展開図の「B-71」を切り取って折り線指示に従って折り、下図のように接着します。

上でつくったパーツを、10でつくったパーツの「B-71」と書かれた場所に接着します。前後を間違えないように注意してください。
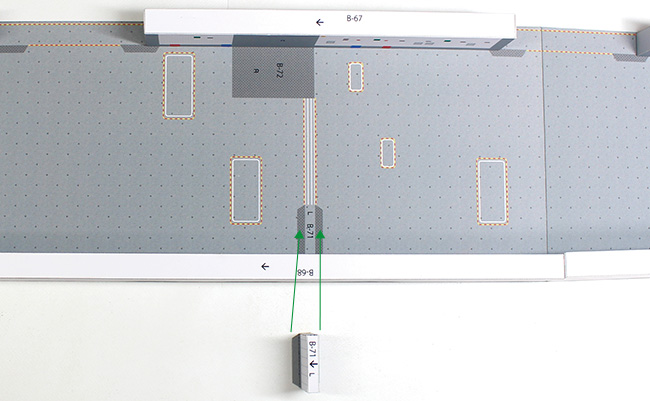
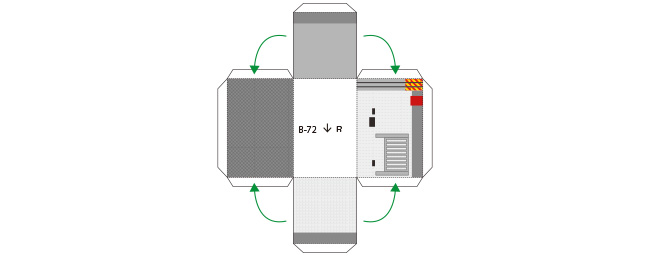
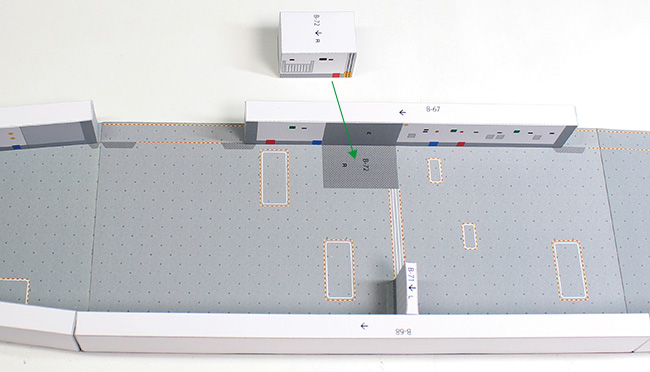
12. パーツB-72の組み立てと取り付け
展開図の「B-72」を切り取って折り線指示に従って折り、下図のように接着します。
上でつくったパーツを、11でつくったパーツの「B-72」と書かれた場所に接着します。前後を間違えないように注意してください。
13. パーツB-73の組み立てと取り付け
展開図の「B-73」を切り取って半分に折り、裏面同士を接着します。

上でつくったパーツを、12でつくったパーツの「B-66」の内側壁面に接着します。
14. パーツB-74の組み立てと取り付け
展開図の「B-74」を切り取り上と同様に組み立てて、「B-64」の内側壁面に接着します。
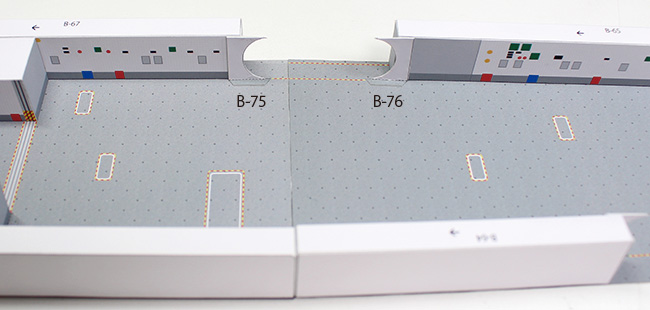
15. パーツB-75, B-76の組み立てと取り付け
展開図の「B-75」「B-76」を切り取り上と同様に組み立てて、「B-67」「B-65」の内側壁面に接着します。
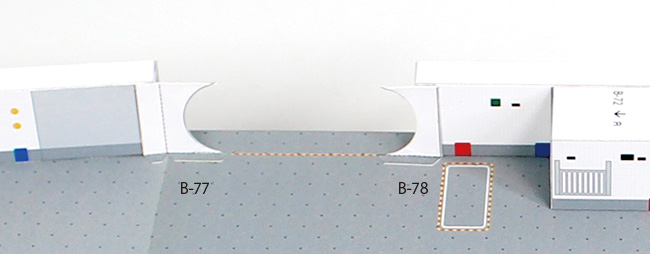
16. パーツB-77, B-78の組み立てと取り付け
展開図の「B-77」「B-78」を切り取り上と同様に組み立てて、「B-69」「B-67」の内側壁面に接着します。
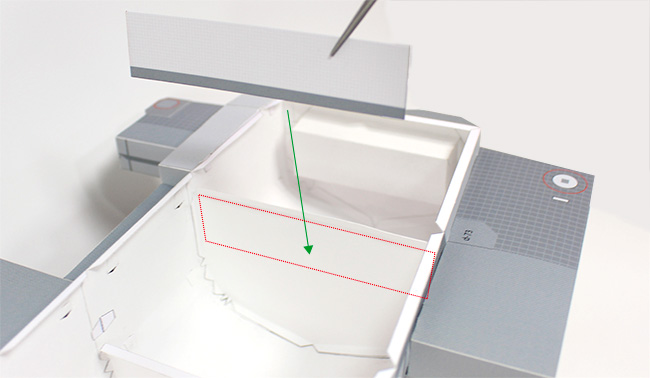
17. 格納庫の船体への取り付け準備
船体の、三箇所のエレベータ開口部のノリシロを立てておきます。
16でつくった格納庫を、下図のように船体内にはめ込みます。
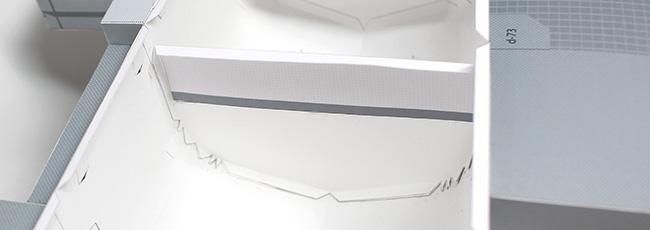
このようになります。
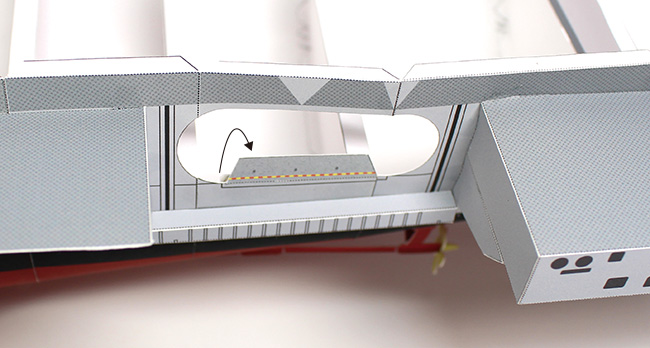
18. 格納庫の船体への接着
エレベータ開口部の三箇所のノリシロを、格納庫に接着します。このとき、赤枠で示した部分になるべく隙間ができないようにしてください。
19. 隙間埋め・補強パーツの取り付け
展開図の「B-79」を切り取り、エレベータ開口部のノリシロの上から接着します。これは補強と、船体との隙間を埋める為のものです。長過ぎる場合は微調整してください。
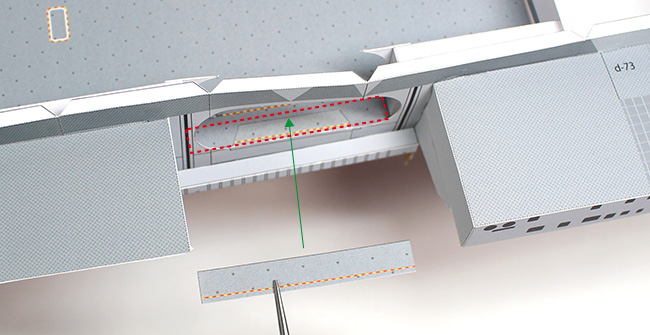
このようになります。
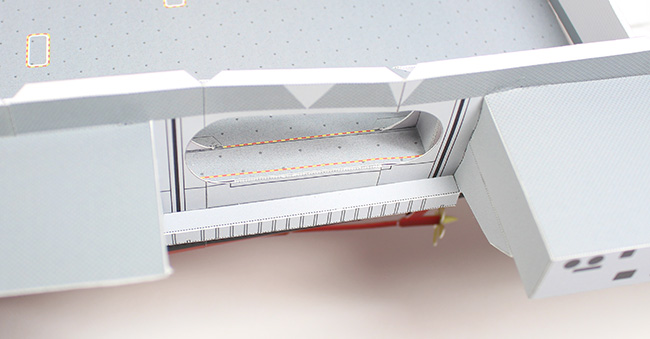
「B-80」「B-81」を切り取り、上と同様に下図のように接着します。
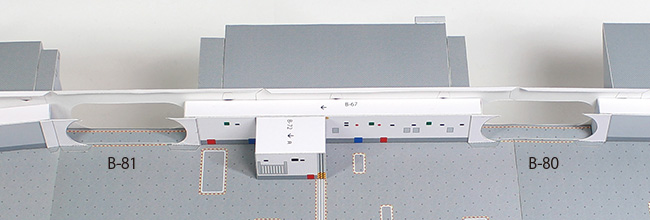
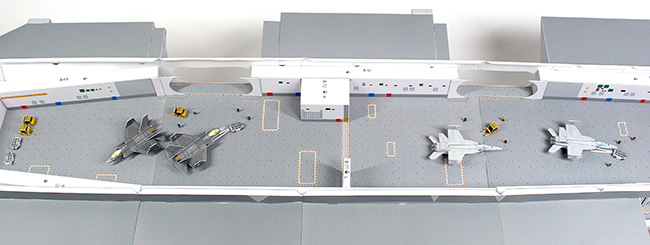
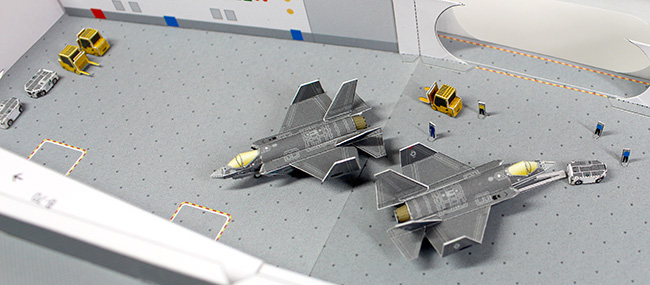
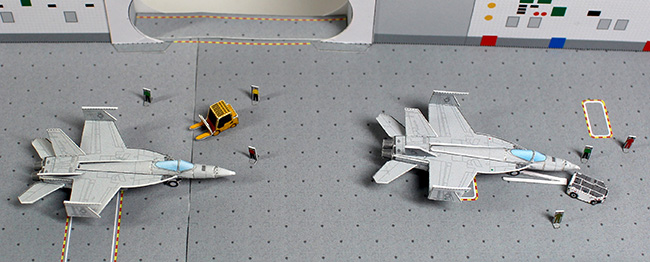
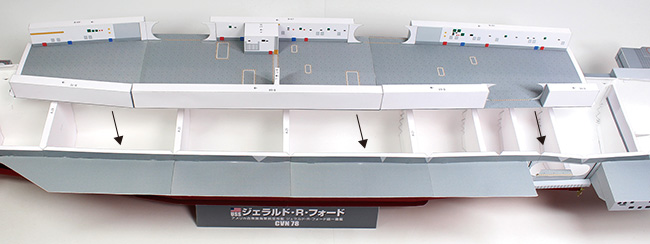
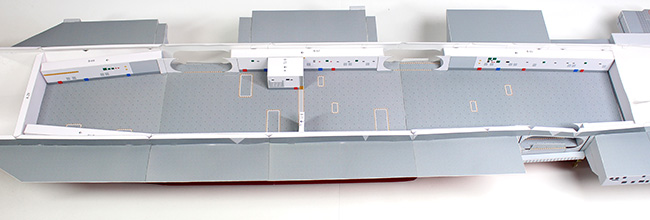
格納庫内に航空機を配置したい場合は、この段階で配置して接着しておくのをお勧めします。航空機のデータはインデックスページにあります。レイアウトは自由に行ってください。航空機はチラッとしか見えないので数機で大丈夫です。翼は格納状態にしてください。
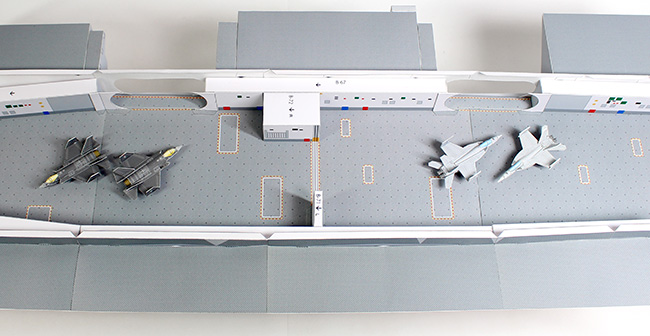
支援車両やデッキクルーを配置すると更にリアリティが増します。完成後はエレベーター開口部からしか見えないことを意識して配置してください。